Digital Chum - Virtual fish guts and other nonsense

Getting organized…

After building the dining room table and the headboard for Megan’s bed, I realized that I was accumulating a bunch of tools that were getting more and more scattered about the garage. We still have a lot of stuff in the garage from our remodeling and we’re trying to get it all organized and moved to proper locations so we can actually park in the garage again before it gets cold out… so my tool and supply accumulation wasn’t moving us in the right direction.

I was also tired of building things on a couple sawhorses and a piece of plywood.

So I thought it was time to build an actual workbench for the garage. I based my design mostly off this plan on Instructables but used a different table top and put it on casters so I could move it around, since I plan to leave this one in the garage and build another woodworking bench for my wood shop when that gets completed.

So here’s the final product…

Rolling Garage Workbench

In addition to the workbench, I needed a place to store all the clamps I’d accumulated, too. I had more than a dozen long clamps that I’d used for the dining room table glue-up and I think at least 457,336 assorted other clamps… most of which were on the floor or on assorted horizontal surfaces. So… time to build a clamp rack. This design came from a Google image search and was a mish-mash of various ideas. The whole thing is on casters so I can easily move it around as needed.

Rolling Clamp Rack

I also added a shelf in the middle and put a “towel bar” of sorts for hanging spring clamps and smaller clamps. I’m going to put a couple hooks on it for hanging miscellaneous stuff.

Rolling Clamp Rack Shelf

I still have a bit more organizing to do, but I’m on the way. We’re running through the last of our “get it done before winter” projects, too, so we’ll be able to move things out of the way soon and free up a couple parking bays.

Another headboard!

This time, Lori made the headboard for the queen-sized bed in one of the guest bedrooms, which we call “The Apathy Room” for reasons that will not be covered here. Lori had a style in mind from the get-go, a couple old curtains that we weren’t going to use again, and a desire to make something that was not absurdly heavy (since we had to eventually carry it upstairs).

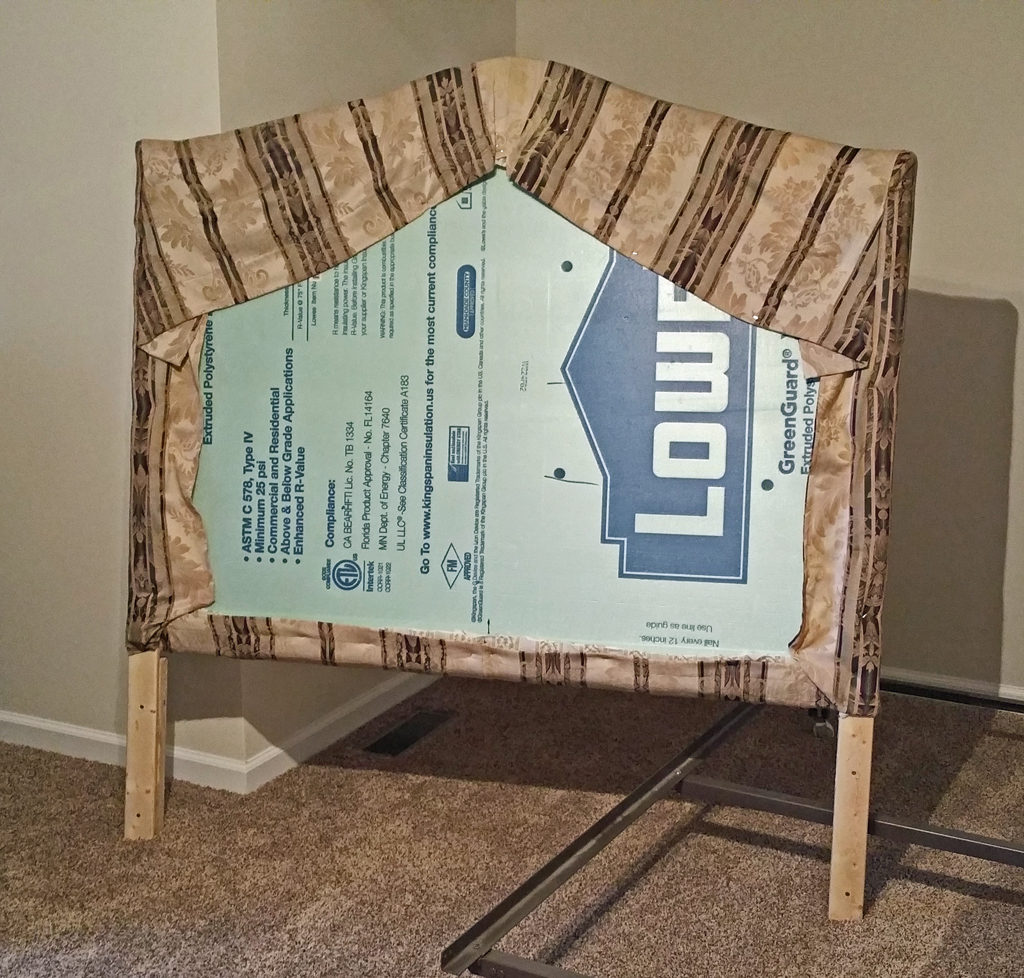
She decided to use 2″ insulating foam board from Lowes as the main structural piece, so she used a hot knife to cut the curved shape. Then she took the curtains in question and sewed them together to form one big piece of cloth, making sure to get the seam to line up perfectly with the lines on the curtains. She also glued some boards to the back of the foam so that we’d have something to attach to the bed frame and so she’d have somewhere to staple the fabric when she was doing the upholstering.

Here’s what it looks like from the front and back…

Apathy room headboard front Apathy room headboard back

After getting it all set up and finishing up the room just in time for my Mother-in-law to come visit, here’s the final product!

Apathy Room

(I think this is a good time to note that we still have no headboard on our bed in our bedroom.)

Megan’s Swoopy Headboard

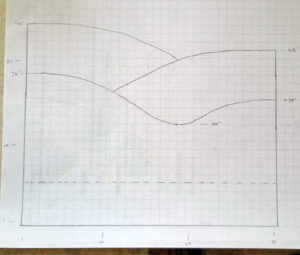
Swoopy headboard drawing

My excruciatingly detailed technical drawing of the headboard

Megan’s bed had no headboard. I could not abide this tale of woe, so I set about designing and building a headboard for her. I sketched out my design idea on the back of an envelope and showed it to her for approval, which she gave to me immediately, much to my surprise.

After getting official approval, I measured the bed frame and then drew my design on graph paper in order to work out the measurements. The plan was to have a three-layer headboard with enough space between layers to put an LED rope light a few inches below the edge for a cool lighting effect.

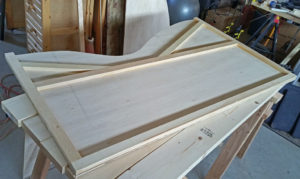
Swoopy headboard constructionI used 1/2″ sanded plywood and a lot of 1×3 lumber. I cut out the “swoop” parts using a jigsaw and got the curves mostly smooth. Each layer was separated by a number of the 1×3 boards, glued and nailed into place with small finishing nails (mostly to keep them in place until the glue dried). I made sure that the top parts wouldn’t have any gaps between layers so if something dropped down between them, it wouldn’t go to the bottom and be irretrievable. I also didn’t want to provide an awesome home for spiders, dead flies, or mischievous dust bunnies.

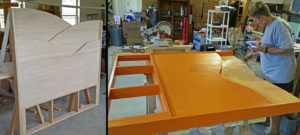
I framed the edges (and the base) with a few nicer-quality 1×4 boards and finished the edges of the plywood with some DAP DryDex, sanding it all until it was smooth enough to paint. Here’s the final product before and during painting. Lori did the painting. We seem to have worked out a good team system where I build the stuff and she applies the finish.

Swoopy headboard before and during painting

After it was painted (and dried for a couple days just to be safe), I took it up to Megan’s room and attached it to her bed frame, installed the LED rope light, and hooked it up to an Amazon Echo-controlled outlet, so all she has to say is “Alexa, turn on my headboard” and the lights come on. I think it turned out pretty well.

Swoopy headboard

Joss Whedon’s “Get out the Vote” PSA…

Funny, yet serious…

“Just a shit ton of famous people” Ha!

xkcd does it right with climate change…

The climate has changed before. Yes. Yes it has.

A Timeline of Earth's Average Temperature

(click for the full xkcd version)

Our cats are not spoiled… Part Three

A few months ago, I read or saw or heard something about how the ideal cat scratching post is tall enough to allow cats to get a full stretch while they’re scratching. Most of the posts you get at pet stores are way too short to meet that criteria… like this one.

This scratching post makes kitties sad.

This scratching post makes kitties sad.

It still works and the cats still use it (unless Oooo! Look! A couch!) but in the interest of (not) spoiling our cats, I decided that a “less than ideal” cat scratching post was, well… less than ideal. Therefore, I set about making one that more closely resembled the a scratching post fit for a frickin’ lion.

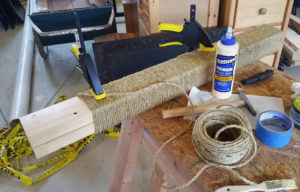
For the post itself, I took two 2x4s and screwed them together to make a solid and adequately sized post. I cut it to a length of 36″ and then wrapped it with 1/4″ sisal rope that I got at Harbor Freight for about $8.00 per 100-foot roll.

Sisal Wrapping

The hammer seems out of place

To get things started, I drilled a 1/4″ hole and stuck end of the rope into the hole, adding a small screw to smush it solidly into place. There are various ways to keep the rope in place (staples, hot glue, tacks, etc) but since I had some Titebond glue around, I just smeared that on the post and wrapped the sisal around that, working in about 5″ segments so the glue wouldn’t dry out before I got the sisal wrapped. That worked out really well and the wrapping ended up very solid.

Cloth StaplesAt the top and bottom, I also added some tack-in cloth staples around the rope just to make sure it didn’t slip or pull loose.

From that point, it was just a matter of cutting a big, square base, drilling some holes, wrapping it in carpet, and screwing the post to the base. I’m giving very few details here because of two things. First, I didn’t take any pictures during this process and second, I’m a total failure at cutting carpet with anything remotely resembling precision. Fortunately, it looks fine from the top.

So the finished post is about 36″ tall and is on a base that’s about 20″ x 20″. It looks pretty awesome and I’m sure that it will get used eventually. To be more specific, I’m sure it will get used eventually the way it was intended to be used, not the way Houdini decided to use it.

Houdini using the scratching post

So ungrateful.

Dining Room Table… Finis!

So after quite a bit of drilling, screwing, sanding, gluing, bashing, sanding, clamping, sanding, painting, staining… and sanding, the dining room table is done!

For you “tl;dr” folks, here’s the completed table in its natural habitat…

The finished dining room table

For the rest of you, here are some of the “along the way” details.

I had posted a picture of the base in my first table update. I ended up using that as my work table to do my table top glue-up. I covered it with plastic and put some boards across the top for my pipe clamps. The table top is made of seven 12-foot 2×6’s from Lowe’s.
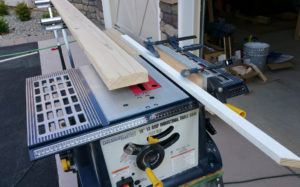
Harbor Freight table saw rip fence

Harbor Freight table saw with make-shift rip fence extension

In order to get nice square edges to glue, I had to rip about 1/4″ off each edge using my little table saw from Harbor Freight. I rigged up a jig to make my rip fence longer since I was pushing 12-foot boards through it. That ended up working fairly well and I was impressed (surprised?) at how well the saw kept up.

The edges weren’t quite perfect, but they were close enough (*cough*) and since it was pine, I figured I’d clamp it tight enough to squish everything together (that turned out to be mostly true).
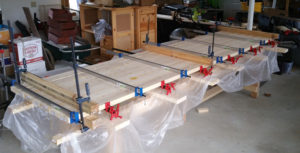
Table top glue-up

So many clamps!

I clamped the first two boards together and kept going, one board at a time. Since it was my first glue-up of this size and I didn’t think I could apply the glue, get multiple boards in place, align them, attach my clamping cauls, and tighten up all my clamps before the glue dried out too much. I waited about an hour and a half (or more) between boards to give the glue enough time to set before I started moving things around to add another board. The final clamping (shown in the picture), I left alone for a little more than 12 hours.

There was a lot of excess glue on top. That took a lot of scraping to remove after it dried… followed by a lot of sanding to get everything level (because all the scraping took off some wood, too). But I got it all removed (Make a mental note of this bold claim. It’ll come up later) and sanded it to a nice finish using 80-grit, 120-grit, and 220-grit sandpaper. I also routed a 1/2″ round-over edge all around the table top.
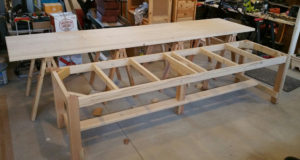
Table top and base

Table top and base… ready for finishing!

I arrived at this point where everything was ready for finishing! I had planned on finishing it myself, but I only get to work on this sort of thing about an hour or so a day (if that) and on weekends, so Lori offered to do it for me. She’s been doing a lot of painting and refinishing lately, so I figured she was in the zone and I’d go ahead and let her do the finishing work on the table. I’m really considerate that way (wait, what?!).

The base was to be painted white and the top was getting a dark stain to go with our kitchen and living room woodwork. After the first coat of stain, the top looked fantastic. It really brought out the nice grain and was the perfect shade of rich brown. Lori did a second coat of stain and suddenly (remember that mental note you made about my claim of having removed all the glue?) every… little… spot… where glue had touched the wood showed up like a fluorescent beacon, as if the wood and the glue were conspiring to make a mockery of me and my vain attempt at glue removal.

But… thanks to my friend Darren (I can call him that. I paid him) who had loaned me his belt sander, it only took an hour or so for me to sand the table back down to the bare wood (or close enough) for another go at staining… with only a single coat this time. The results were perfect again after one coat, so Lori and I agreed that one coat was what we’d both meant to do in the first place, anyway (She was also nice enough to not call me out for my lack of glue-removal skillz).

So the table top was stained. The base was painted white. We moved it into the dining room and Voila! Of course now Lori couldn’t reach the salt, but what are you gonna do?
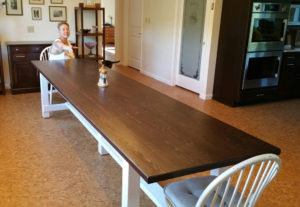
Table with white base

After having it in the dining room for a few days, she said (and I agreed) that it was a little too “farmhouse style” for what we wanted. She suggested that painting the base black might dress it up a bit. So we (and by “we” I mean “she”) repainted the base a nice satin black, which created exactly what we were looking for.
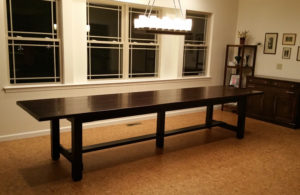
Final dining room table

Final dining room table

The table is 11-feet, 11-inches long (that was done on purpose) and weighs roughly ten bazillion pounds (that was not done on purpose). The top was finished with seven or eight coats of Minwax satin polyurethane. We should be able to easily seat twelve people… fourteen if people want to get a little squishy.

We’re missing chairs… but that’s another adventure!


Hat tip to the following sites for design and construction inspiration:

Dining Room Table Base

I’m in the process of building our new dining room table. The dining room is pretty long, so Lori wanted a table that was about 12 feet long. It’s tough to come by those (at a price that is budget-friendly), so I decided to make one.

I looked at a lot of different plans and designs. None were exactly what I was looking for (or what I needed), so what I came up with was a hybrid. The one that was the “foundational” design, more or less, was this table on Ana White’s website. Because my table was going to be quite a bit longer, I put an extra leg in the center. I changed a few other details as well.

The base is assembled with a combination of dowels, glue, wood screws, and pocket screws. I used lumber from Lowe’s and added some decorative edges with my router so it won’t look quite so “Farmhouse” style. The base itself is 9 feet and 7 inches long and about 31 inches wide.

The table top will be 11 feet and 11 inches long (roughly) and 35 inches wide. I’ll be edge gluing 7 12-foot 2×6’s together to get (I hope) a nice, smooth surface, and then staining it a dark brown. The base will be painted white.

The table should be able to seat 14 people without much crowding… 12 people with plenty of elbow room.

Dining Room Table Base

Snowy House

Sunday after the big weekend blizzard.

Snowy House

Brilliant.

Cyanide & Happiness #4062